

Customize your checkout page
Customize your checkout page
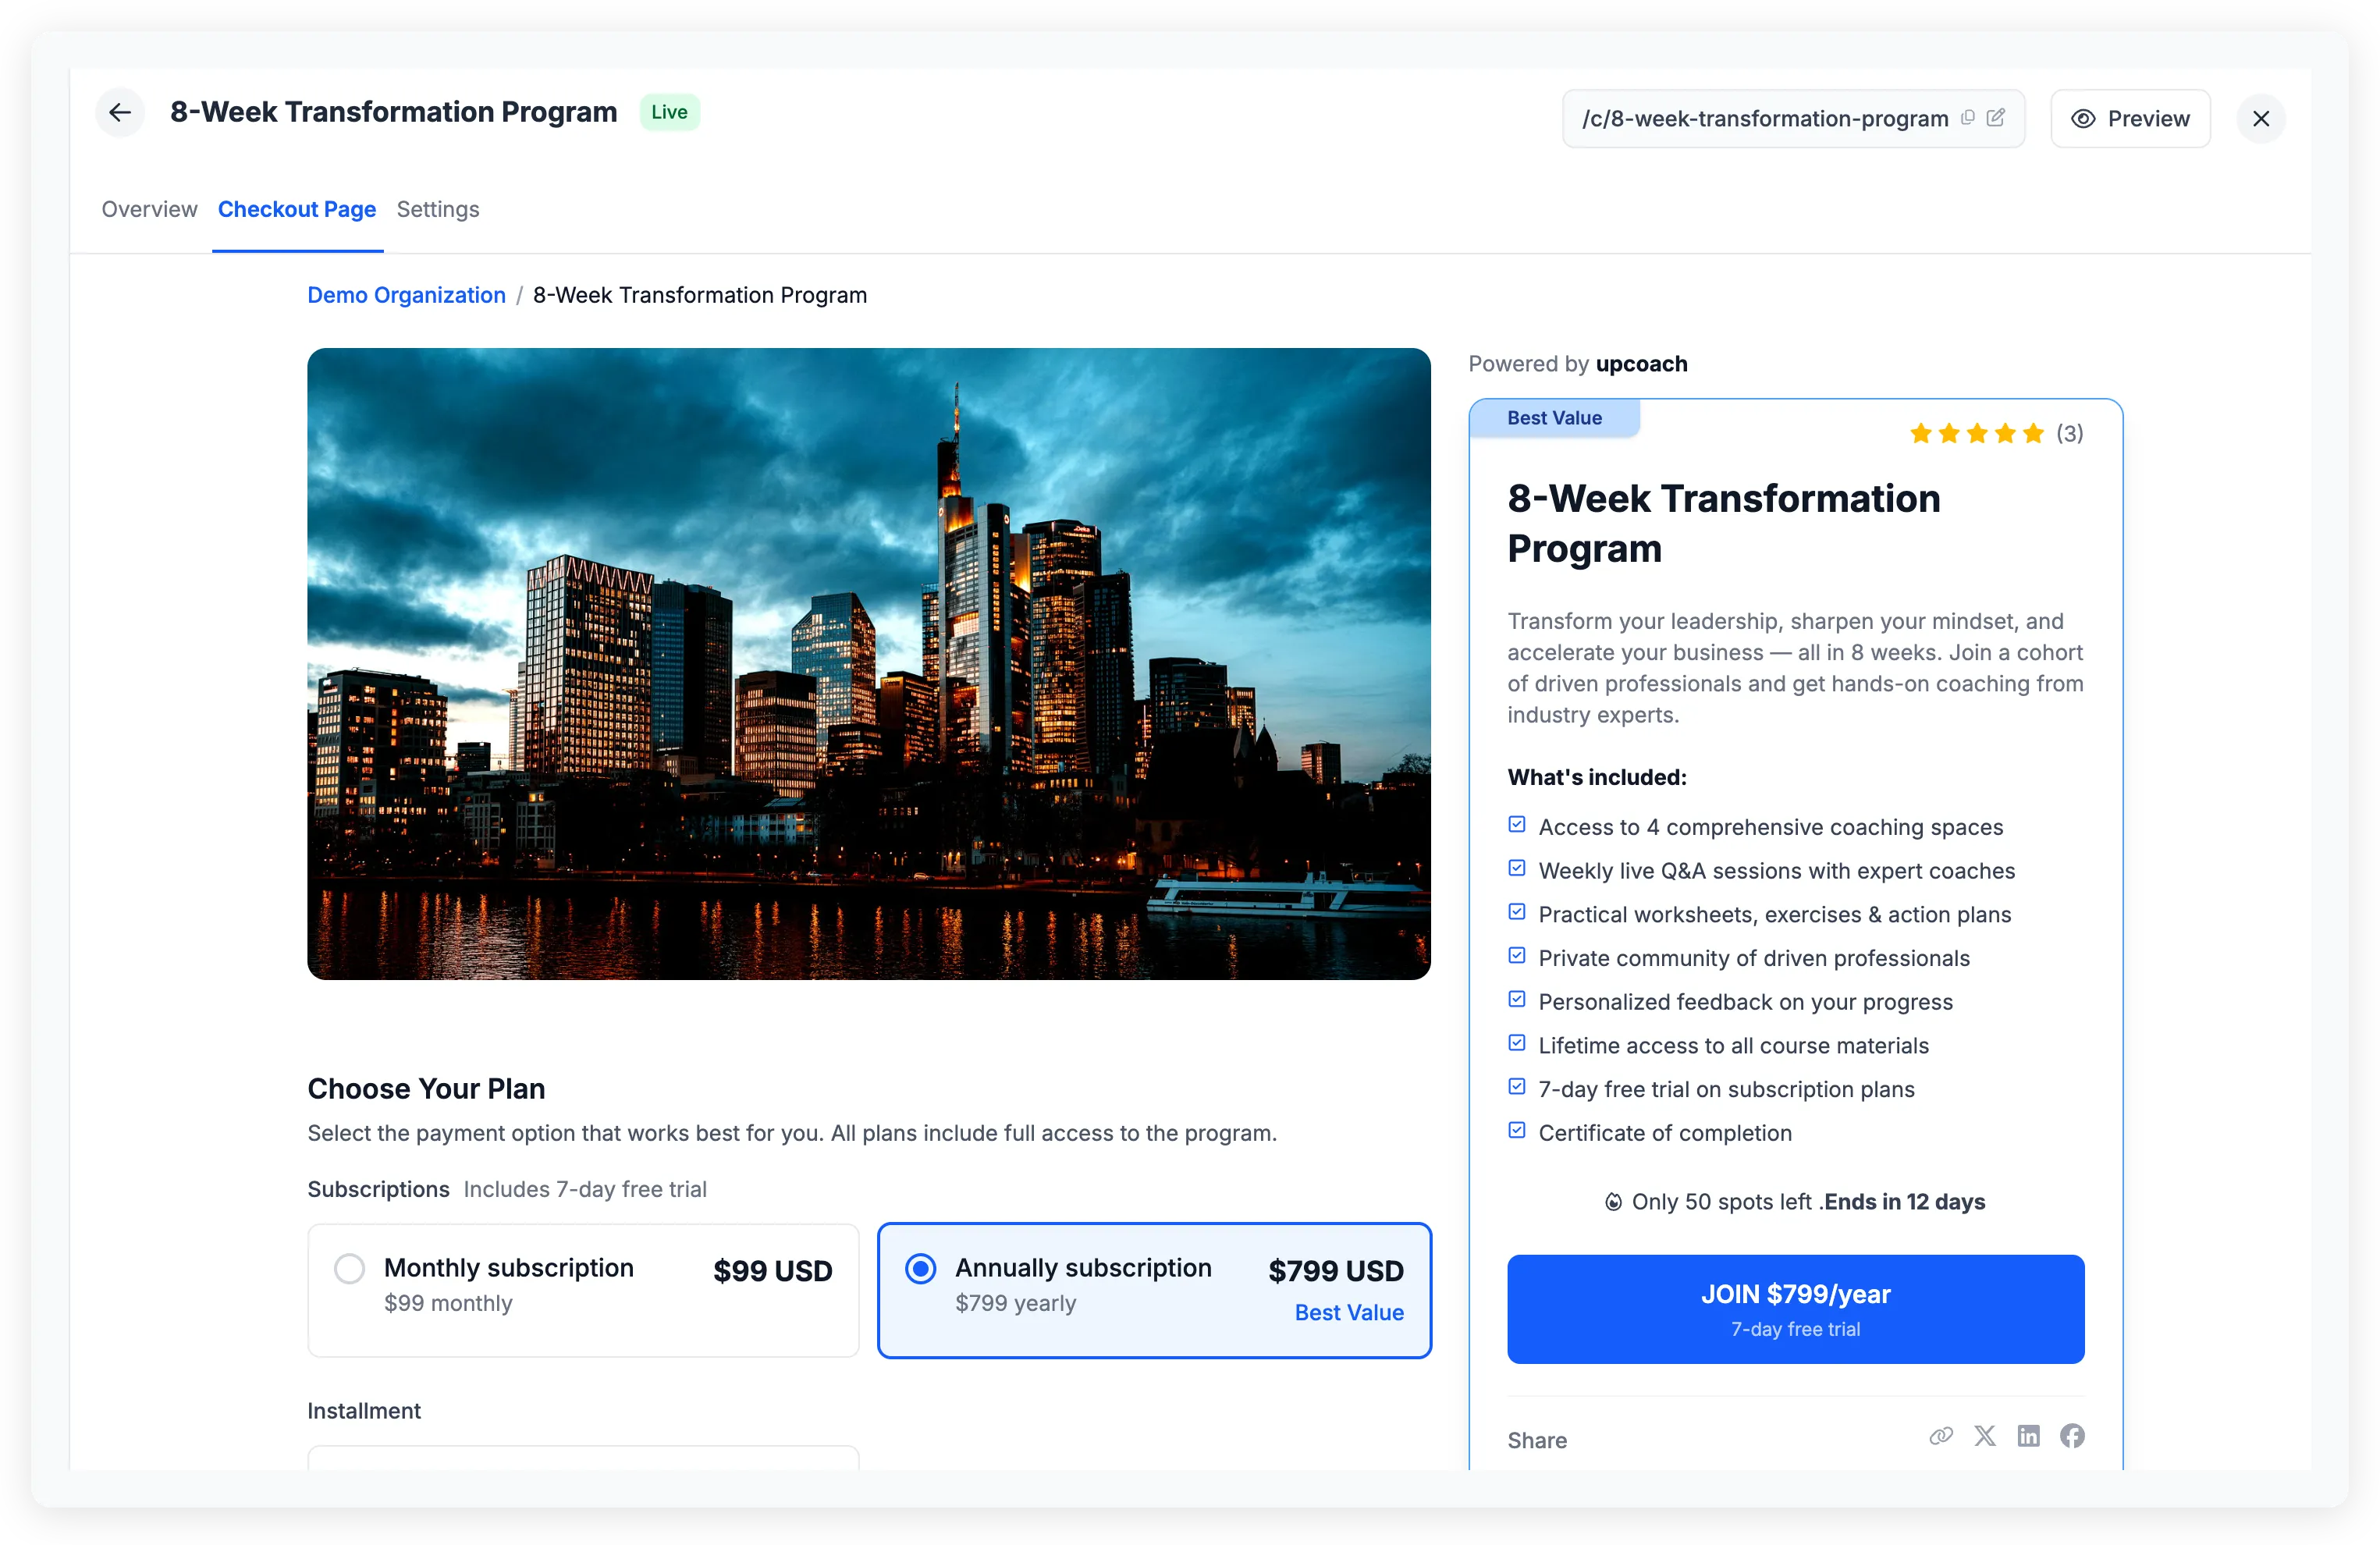
Every offer has a checkout page — the public page where participants learn about your program and enroll. The checkout page builder lets you add media, testimonials, FAQs, and other sections to turn that page into a compelling sales page.
Open the checkout page builder
- Open Admin Area > Sell.
- Click an offer to open its detail panel.
- Select the Checkout Page tab.
The builder shows a live preview of your page. Hover over any section and click Click to Edit to open its settings.
Sections
Media Gallery
Add photos, videos, or embedded videos (YouTube, Vimeo, Loom) to showcase your program. Drag items to reorder them. The first item displays as the featured media at the top of the page.
About This Offer
Set a title and rich-text description for your offer. Use formatting — bold, lists, links — to highlight what makes your program valuable. Enable “Collapse long sections with a ‘View More’ button (Recommended)” to keep long descriptions from pushing content below the fold.
Who Is This For
Define up to three audience types, each with an icon, color, and short description (160 characters max). This helps visitors quickly see whether the program fits their situation.
Testimonials
Add testimonials from past participants. Select existing organization members — their name, photo, and title pull from their profile automatically — or add testimonials manually with a name, photo, and quote (500 characters max). Each testimonial supports an optional star rating.
Hosts
Feature the people running the program. Search and add organization members as hosts — their profile photo, headline, bio, and social links display automatically. To update how a host appears, edit their profile. Changes apply everywhere that host is shown.
FAQs
Add questions and answers that help visitors decide. The builder starts with placeholder FAQs you can edit or replace. Visitors see them in an expandable accordion format.
Payment Options
Set a title and short description (80 characters max) shown above your pricing. This section only appears when the offer has more than one payment option. To add or change prices, use the Settings tab.
Checkout Card
The sticky sidebar card is where participants enroll. You can set:
- Offer Title — override the default title shown on the card
- Short Description — a brief summary (500 characters max)
- What’s Included — 3 to 8 benefit lines (140 characters each), displayed as a checklist
Under Urgency Tools, toggle these signals:
- Best Value badge on a specific payment option
- Testimonial stars showing the average rating
- Remaining spots (visible when an enrollment cap is set)
- Enrollment deadline countdown (visible when a deadline is set)
- Share buttons for social media
Show or hide sections
Each section has a “Show this section on the checkout page” switch inside its editor. Turn a section off to simplify the page — your content is preserved and you can re-enable it later.
Preview your checkout page
Click Preview at the top of the offer detail panel to see the page as a visitor would. Share the checkout URL displayed below the offer title once the offer is live.