

Create lessons to deliver content to participants
Create lessons to deliver content to participants
Lessons are the core content activity in your curriculum. Use them to deliver instructional material — text explanations, video walkthroughs, embedded media, and downloadable files — that participants consume and mark complete at their own pace.
Before you begin
- You need a program with the Coaching & Learning app installed
- You need at least one section and one module in your curriculum (see Build your curriculum)
Create a lesson
- Open your program and click the section where you want to add the lesson.
- Inside a module, click the add button to open the Add Activity modal.
- In the New Activity tab, select Lesson.
- Give the lesson a title (minimum 3 characters).
- Add your content using the sections described below.
- Click Save when you’re done.
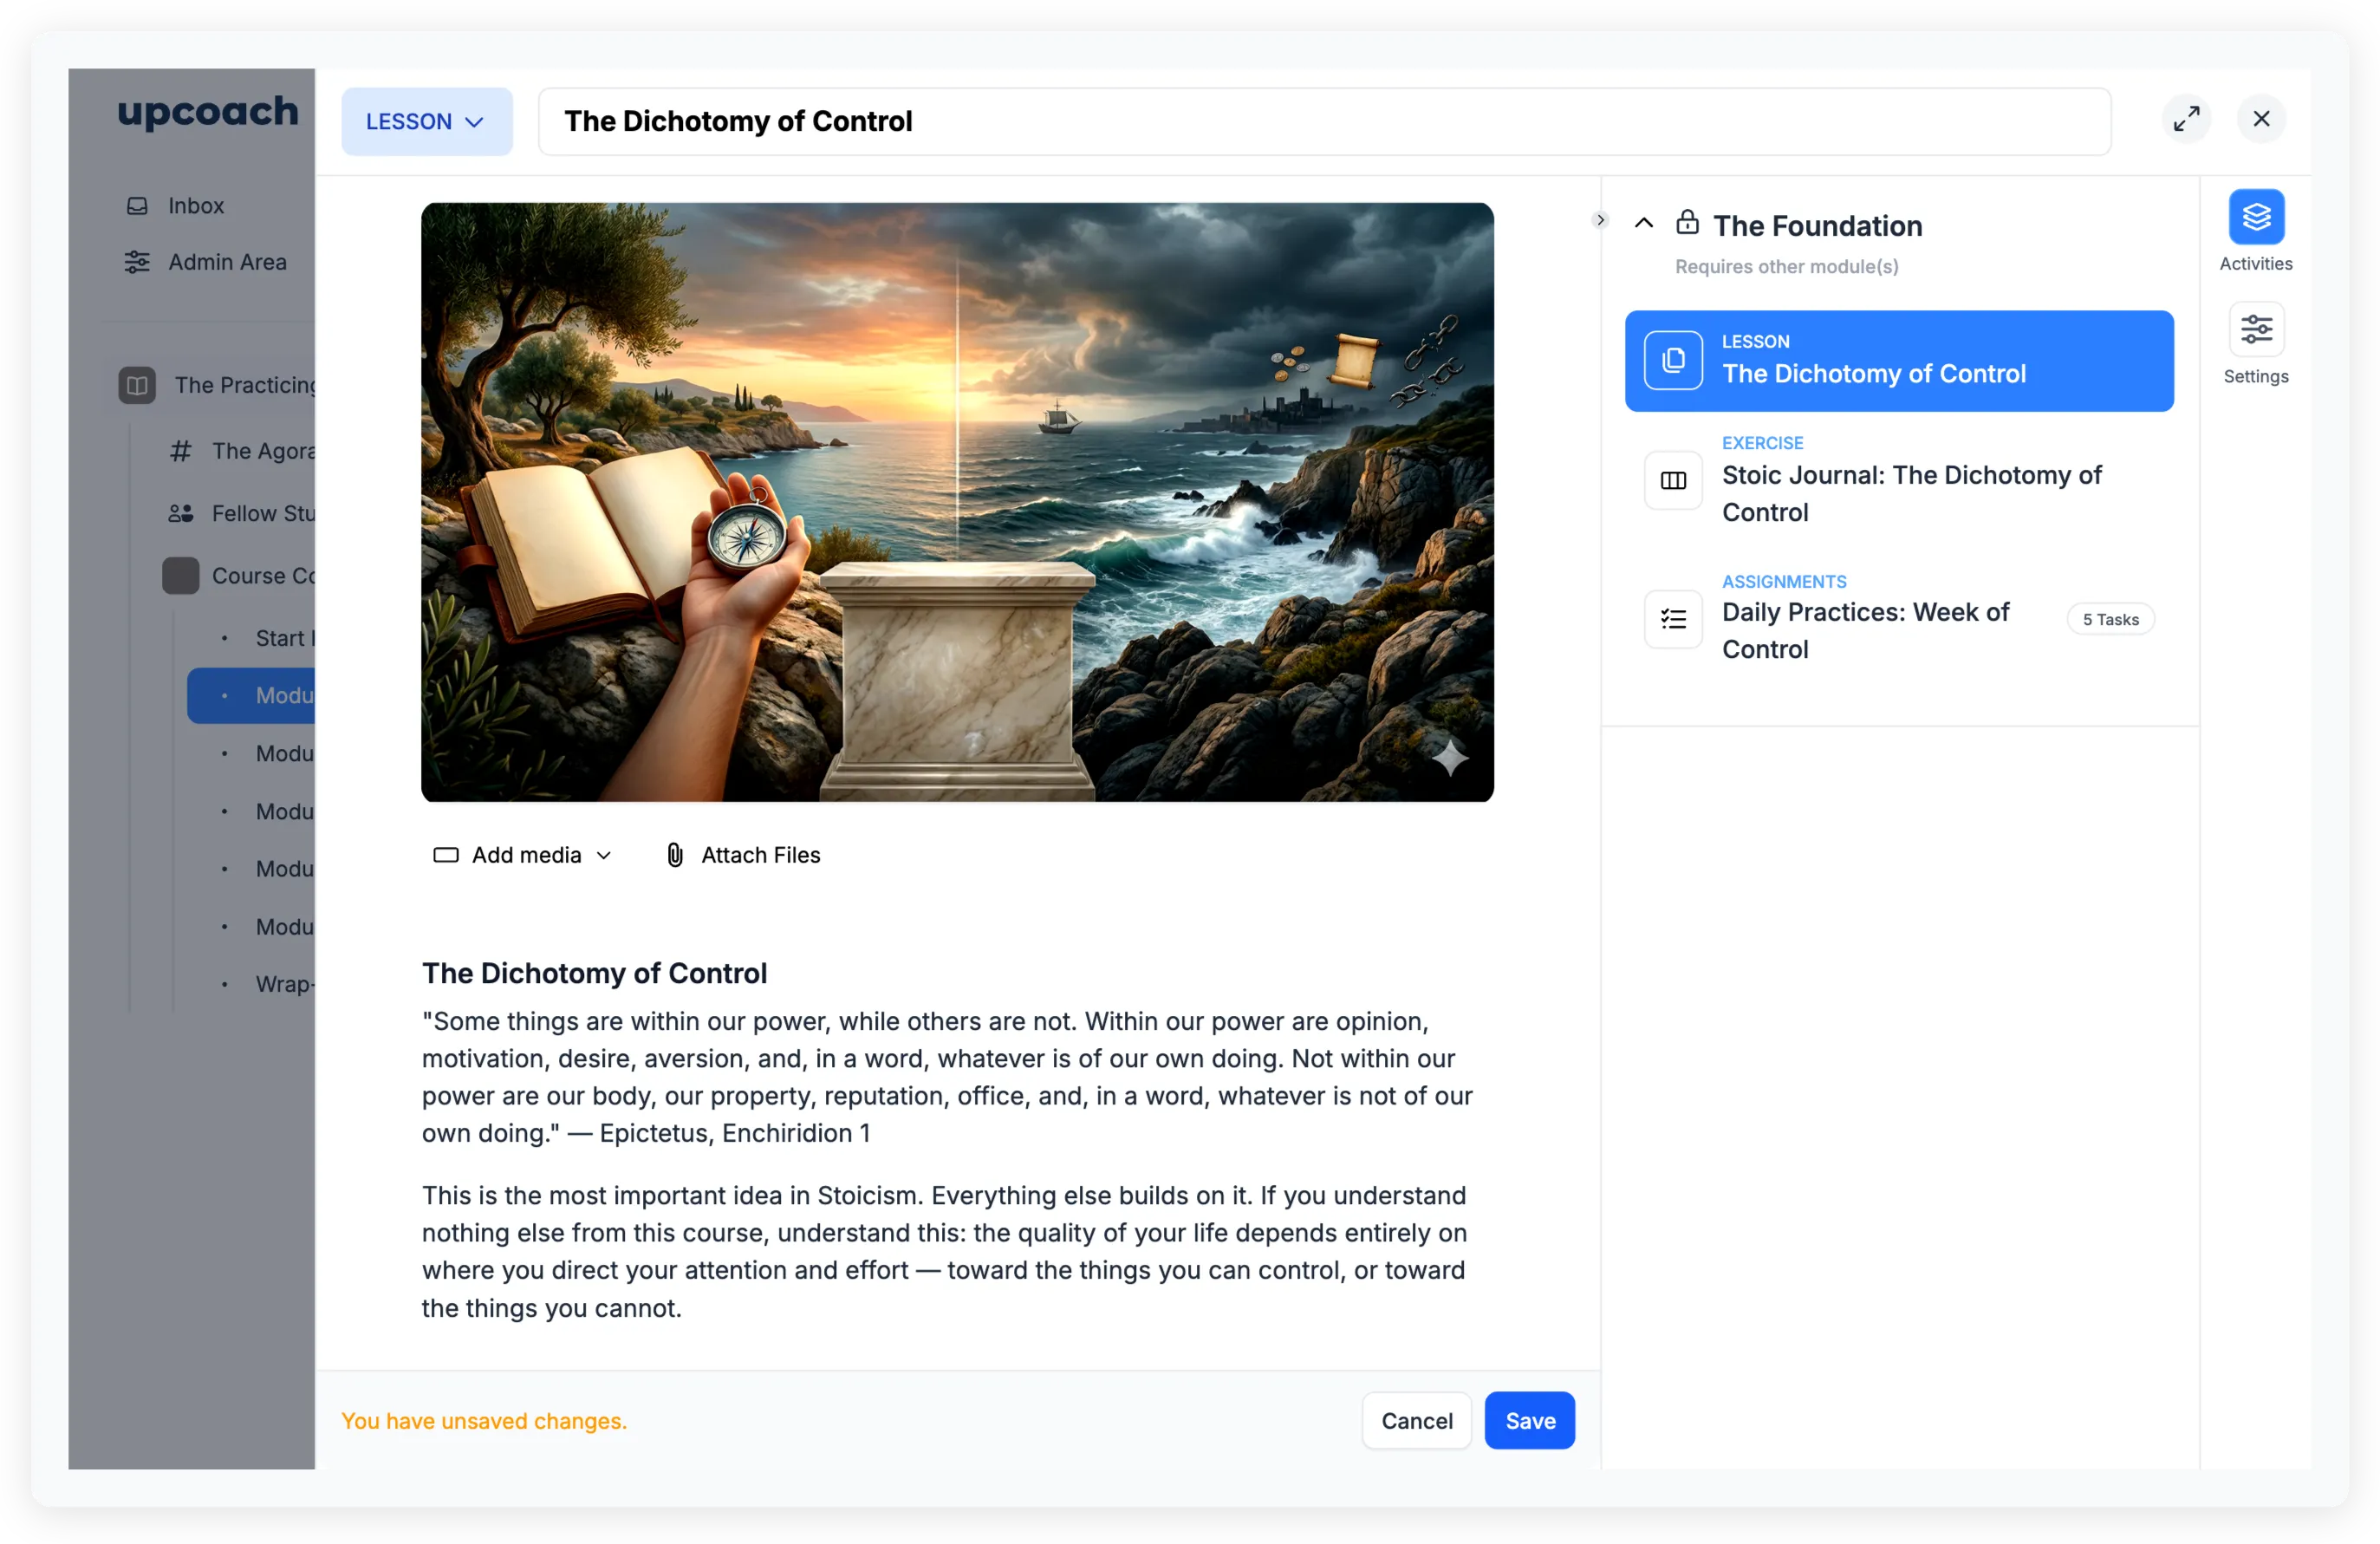
Add featured media
Every lesson can have one piece of featured media displayed prominently at the top. Click the Add media dropdown and choose one of:
| Option | What it adds |
|---|---|
| Add Video | A video from your media library or uploaded directly |
| Add Image | An image displayed as a cover at the top of the lesson |
| Embed Media | An external embed like a YouTube or Vimeo video |
Only one featured media item shows at a time — adding a new one replaces the current one. To remove it, click Remove Video or Remove Image.
Write lesson content
Below the featured media is a rich text editor where you write the body of your lesson. The editor supports:
- Text formatting (bold, italic, underline)
- Headings
- Bullet and numbered lists
- Links
- Blockquotes
- Code blocks
Use this area for explanations, instructions, key takeaways, or any written content that accompanies your featured media.
Attach files
Click Attach Files below the content editor to add downloadable resources. Attachments appear at the bottom of the lesson for participants to access.
You can attach up to 10 files per lesson — PDFs, documents, images, spreadsheets, or other file types. Drag items by the grip handle to reorder them.
Attachments are useful for worksheets participants print out, slide decks, reading lists, templates, or any supplementary material.
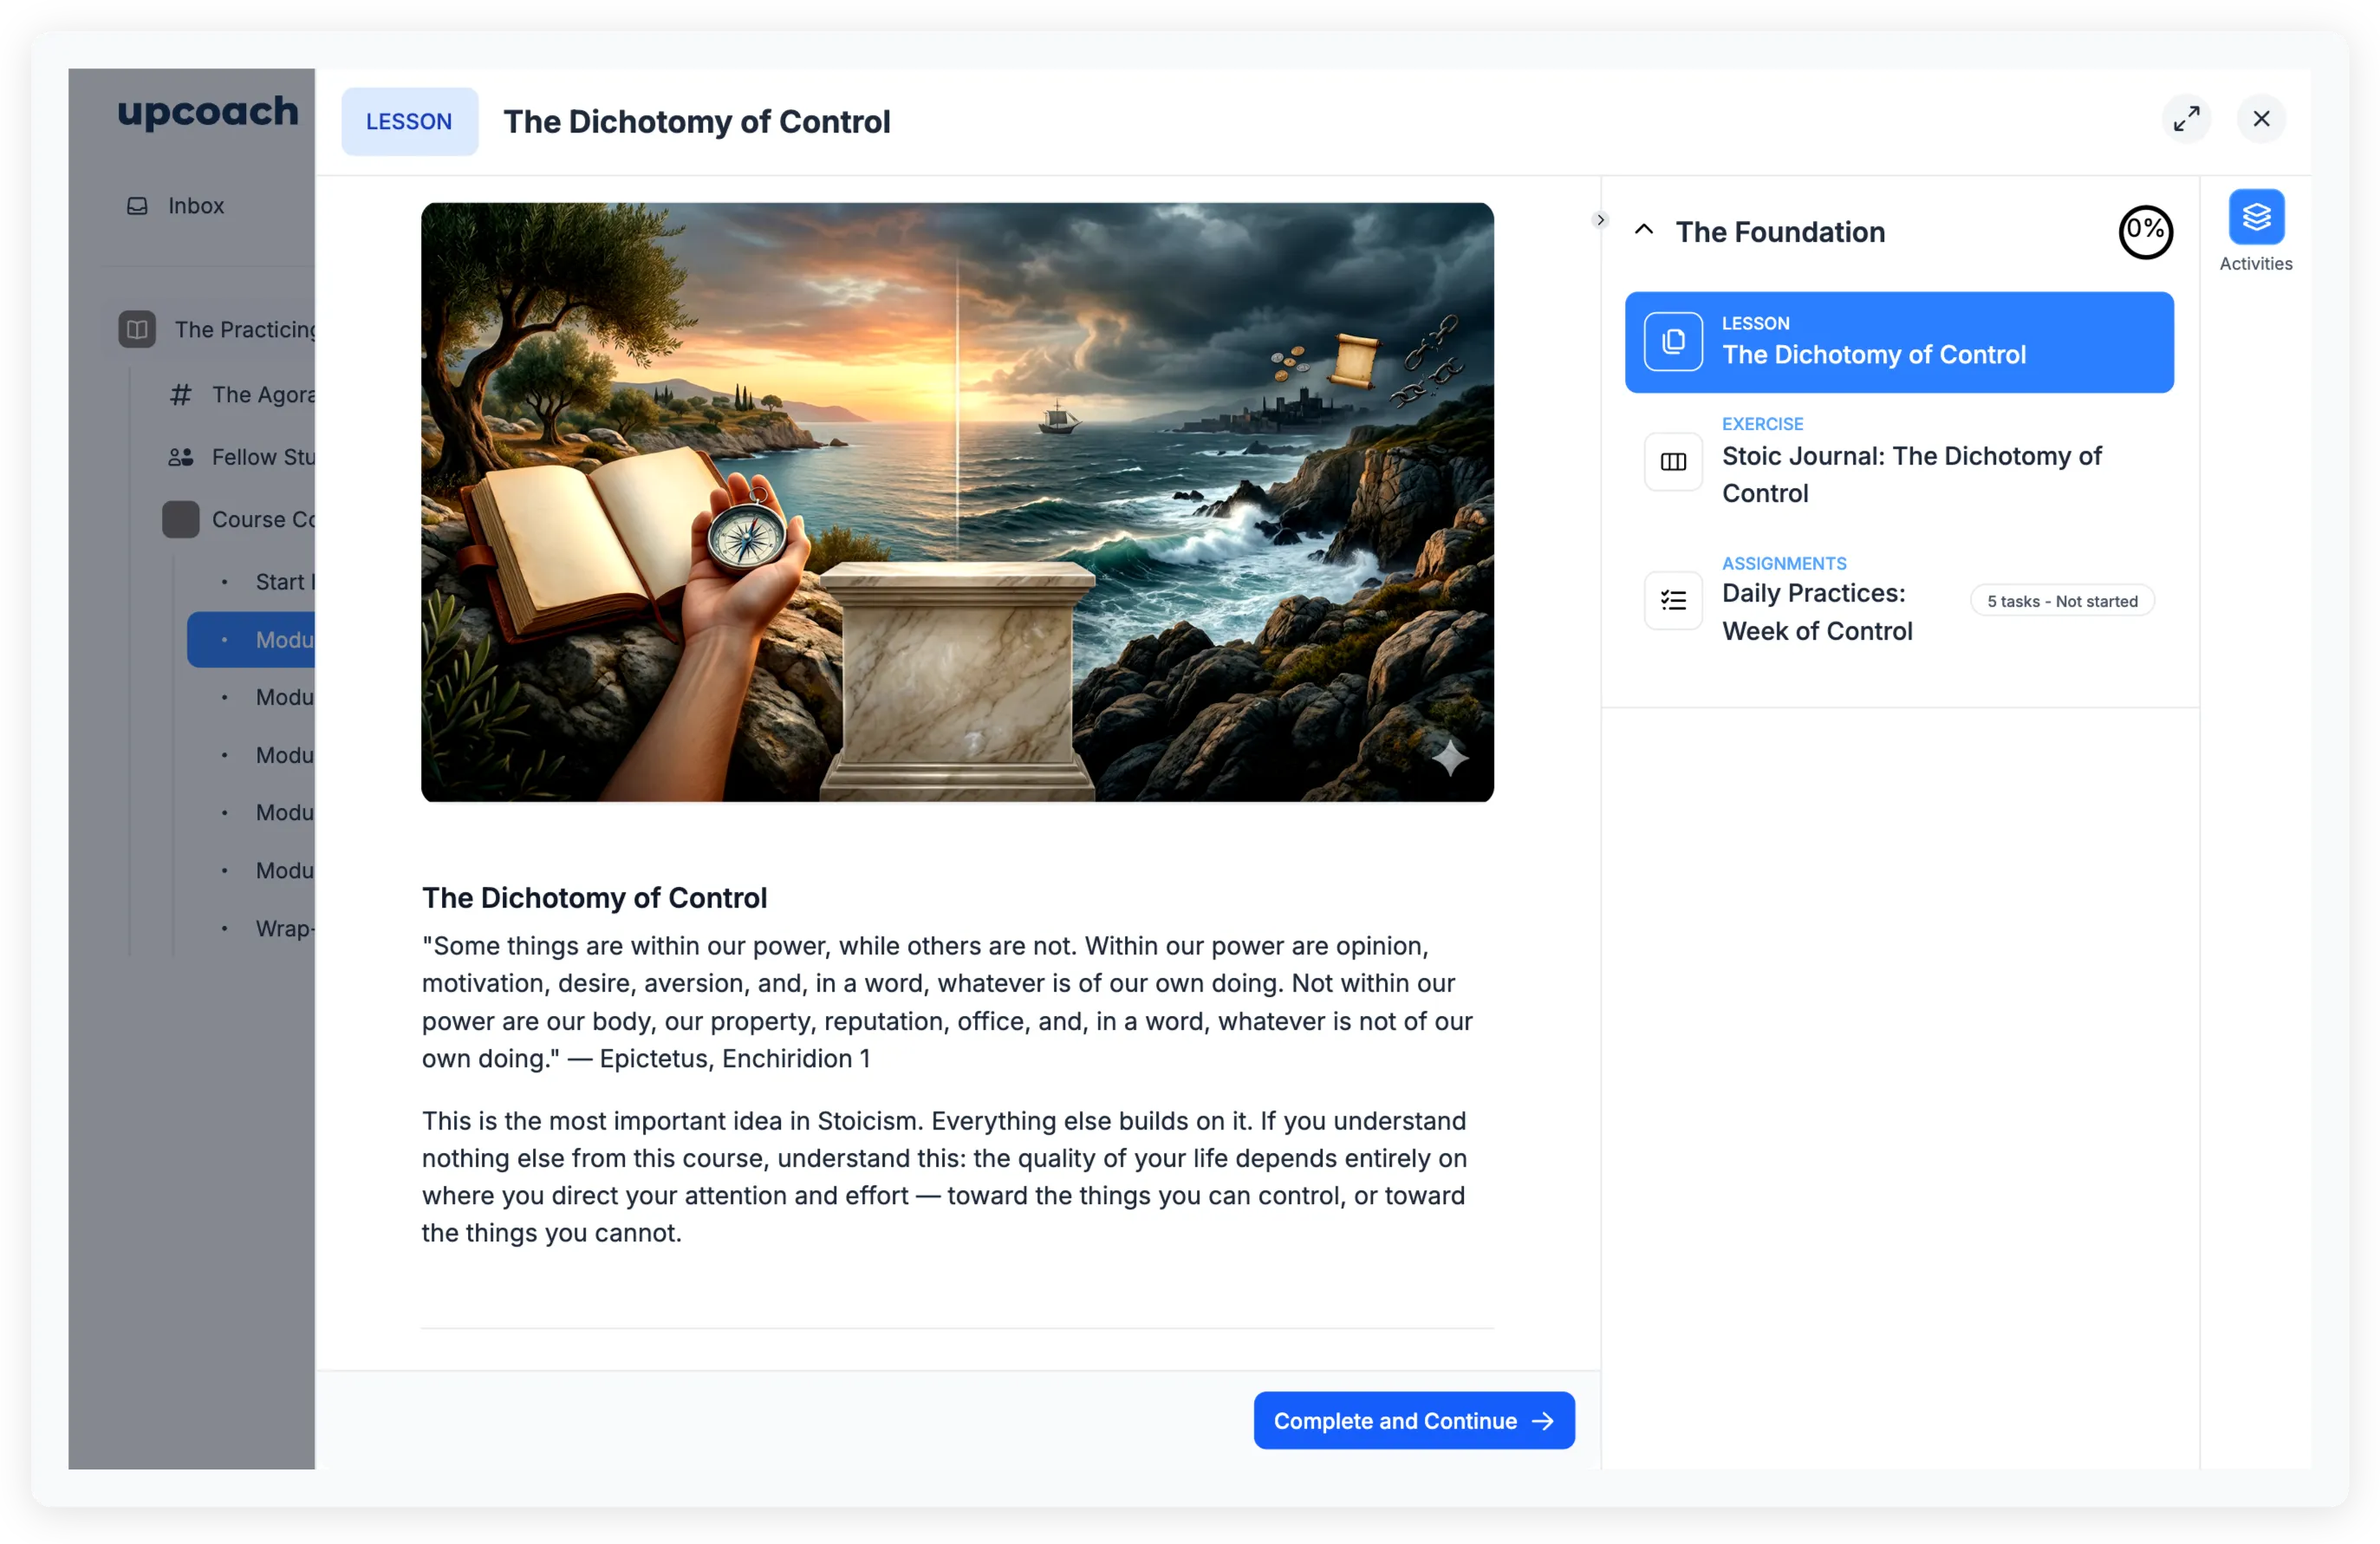
How participants experience lessons
When participants open a lesson, they see:
- The featured media (video, image, or embed) at the top
- The rich text content below it
- Any file attachments at the bottom
After reviewing the content, participants click Complete and Continue in the footer. This marks the lesson as complete and navigates to the next activity in the module.
Unlike worksheets or check-ins, lessons don’t collect responses. They are read-only content that participants move through at their own pace.
Completion tracking
Lesson completion is a simple binary — done or not done. When a participant clicks Complete and Continue:
- A green checkmark appears next to the lesson in the sidebar
- Their progress counts toward the module and section completion totals
- The completion is reflected in progress reports
Reuse lessons across programs
Lessons you create are stored in the Activity Library, which means you can add the same lesson to multiple programs without recreating it.
When adding an activity, switch to the Existing Activity tab in the Add Activity modal to browse and attach lessons from your library. Edits to a shared lesson apply across all copies unless you save a separate copy using Save as New Copy.
For more on the library, see Use the activity library to reuse content across programs.
When to use lessons
Lessons work well for:
- Video tutorials — Record a walkthrough and pair it with written notes or a transcript
- Reading material — Share articles, frameworks, or reference content with supporting files
- Module introductions — Set the stage for upcoming activities with context and expectations
- Resource pages — Collect links, embeds, and downloadable files in one place
- Step-by-step instructions — Walk participants through a process before they complete a worksheet or task list
For collecting participant responses, use a worksheet. For recurring reflections, use a check-in. For action-item checklists, use a task list.